
Azure Portal
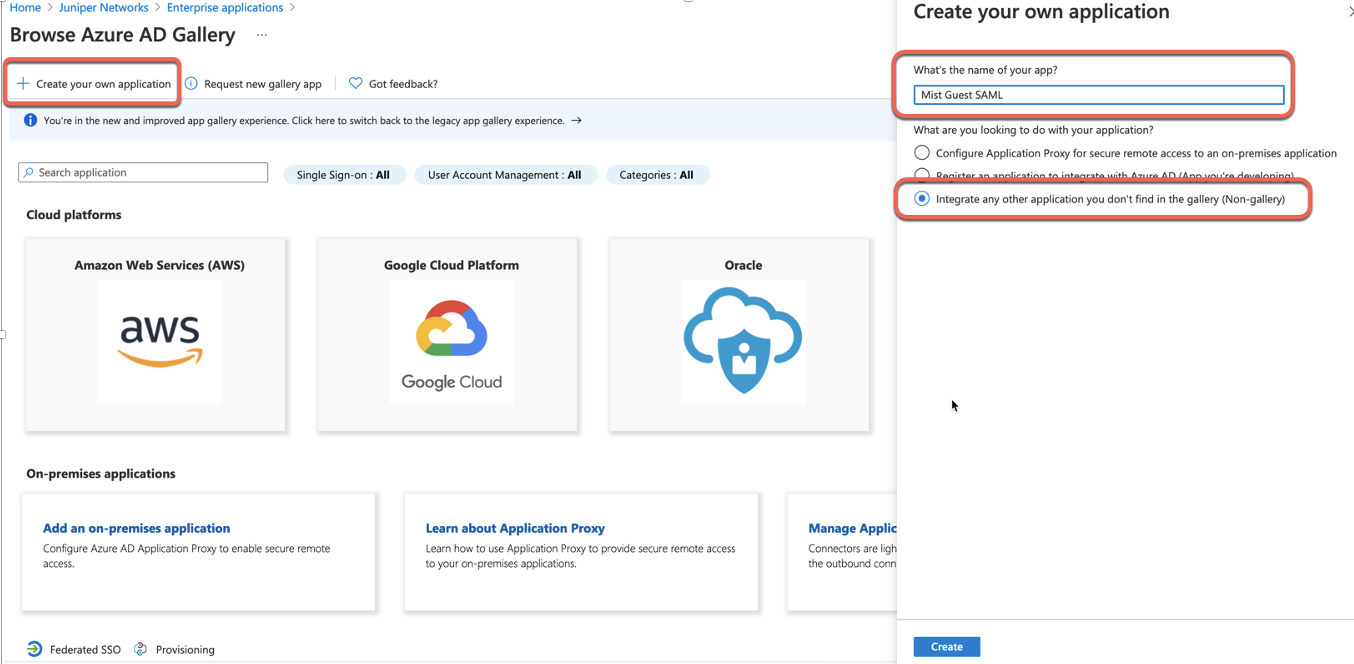
Create
Azure Enterprise App
Azure Active Directory >Enterprise Applications >New Application
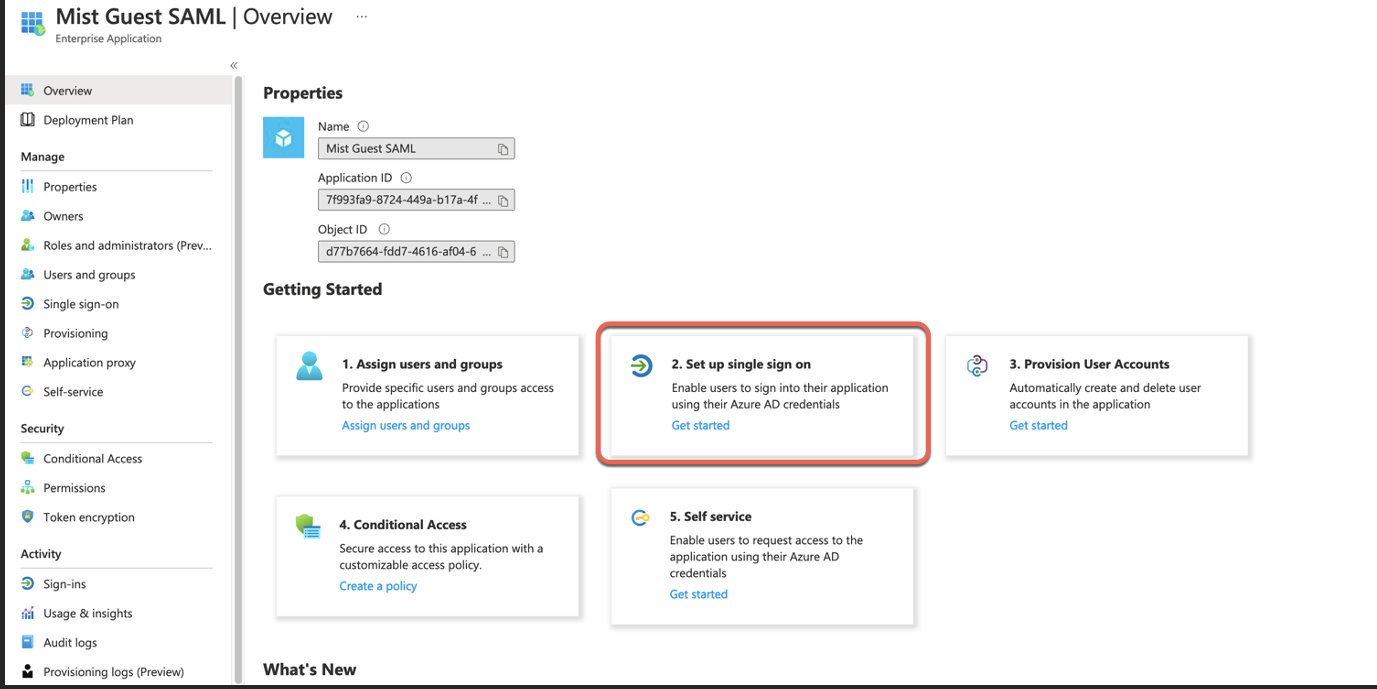
Select Set up single sign on:
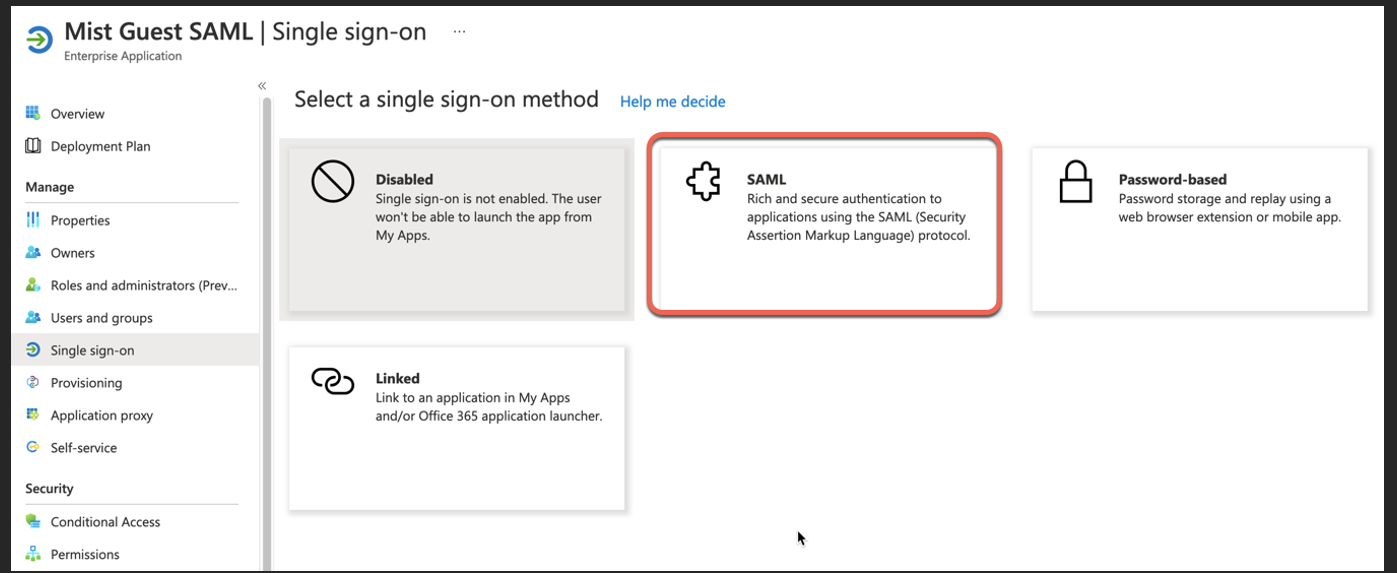
Select SAML:
Copy and save:
· Azure ID Identifier
· Login URL

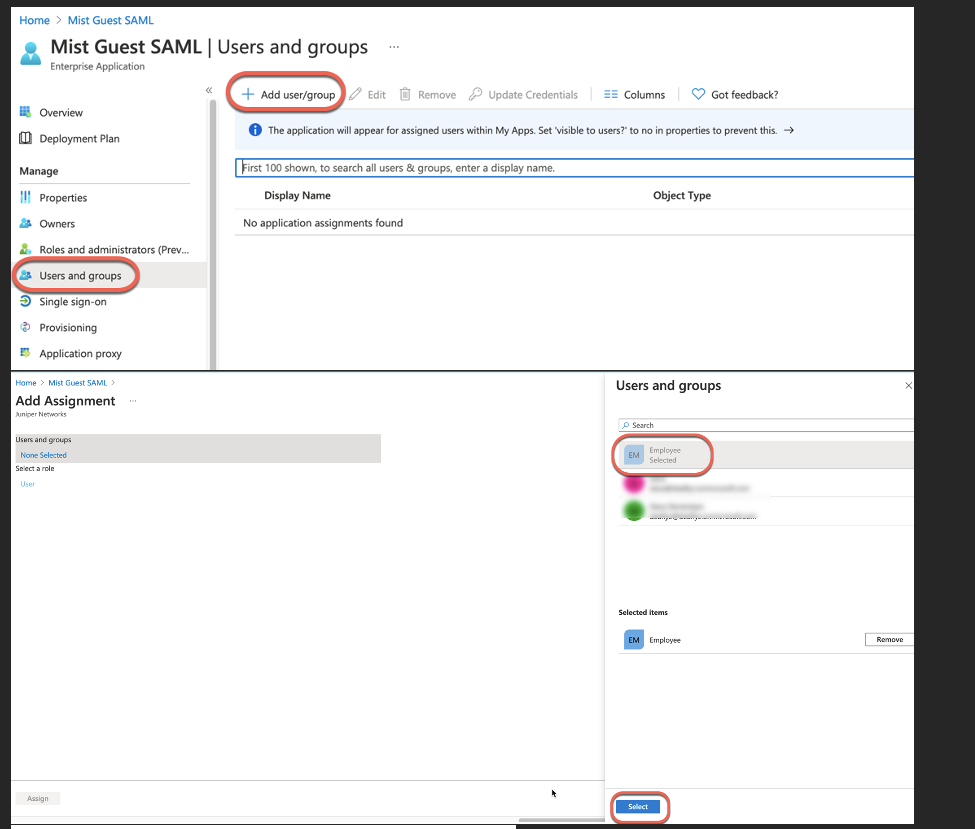
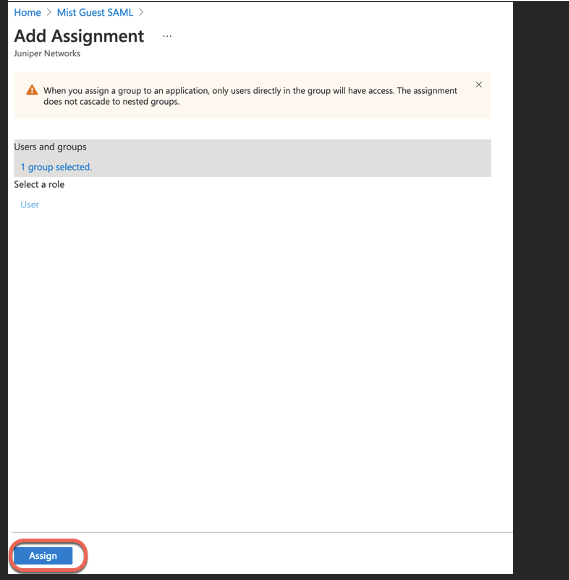
Now, navigate to Users and Groups section and click add to add Users or Groups that will be allowed to authenticate via SSO application:
Mist Dashboard
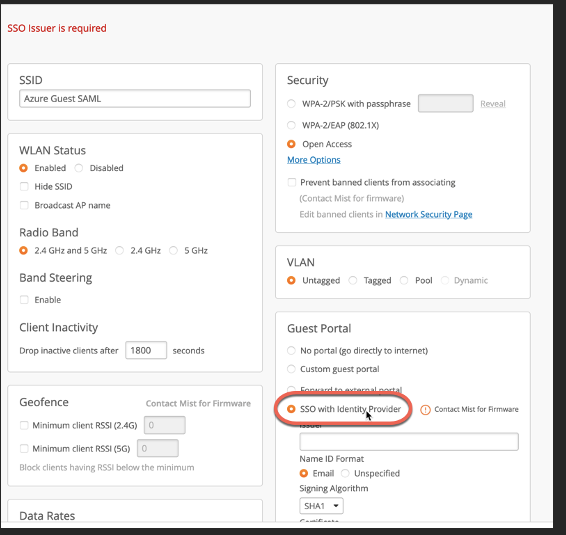
Create WLAN with SSO enabled:
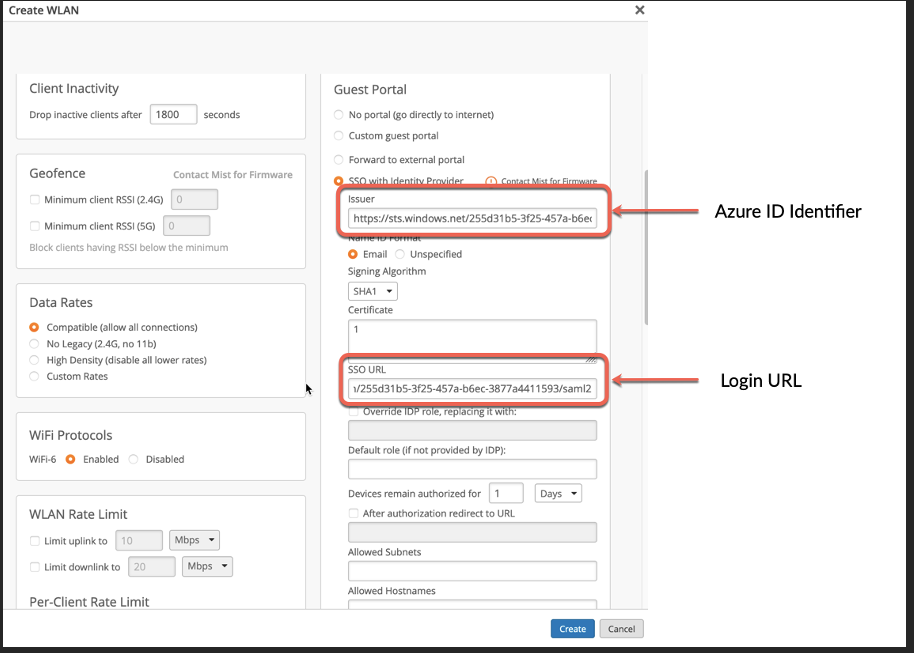
Add Issuer and SSO URL configuration based on the info from Azure App, fill in certificate field with random data for now. Click Create:
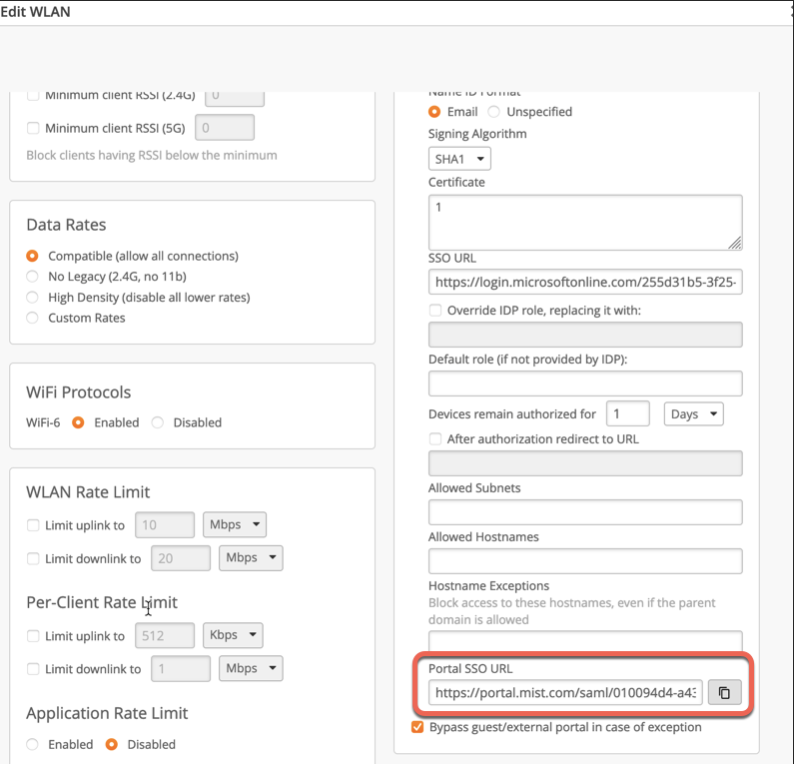
After the WLAN is created, the system will generate Portal SSO URL (not available before WLAN is created). Copy Portal SSO URL and save it somewhere:
Back to Azure Portal
On Azure App config go to Basic SAML Configuration:
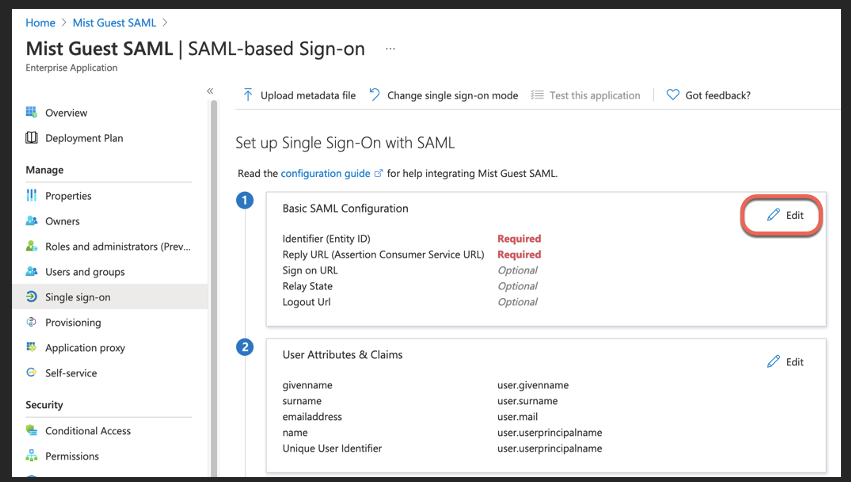
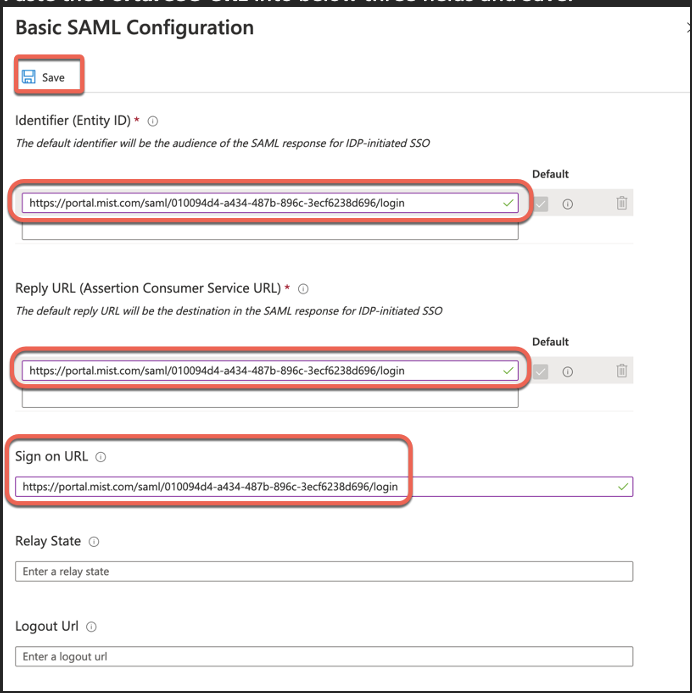
Paste the Portal SSO URL into below three fields and Save:
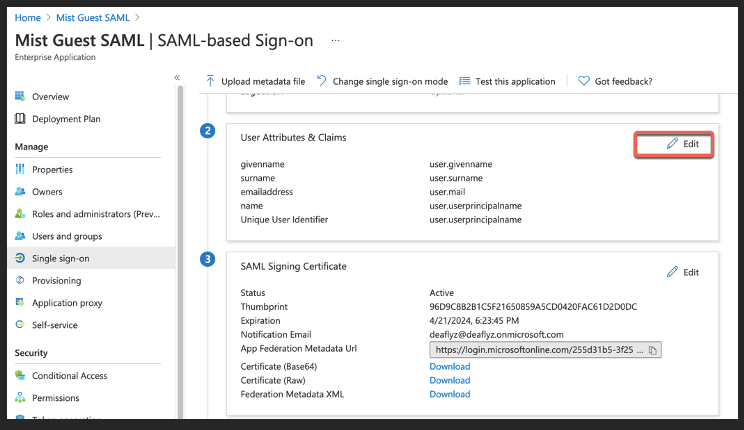
Save and now edit User Attributes & Claims section:
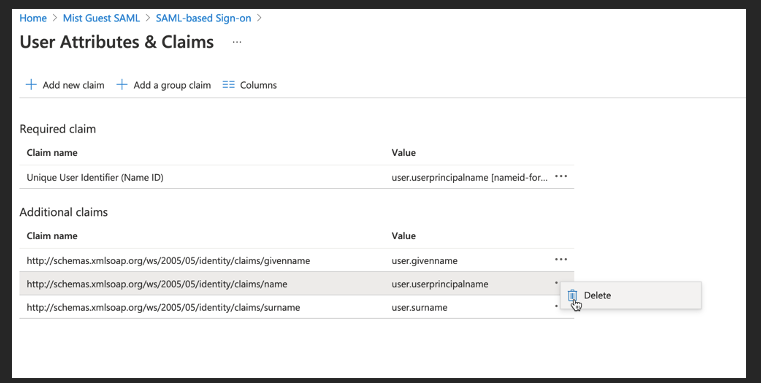
Delete “emailaddress” claim:
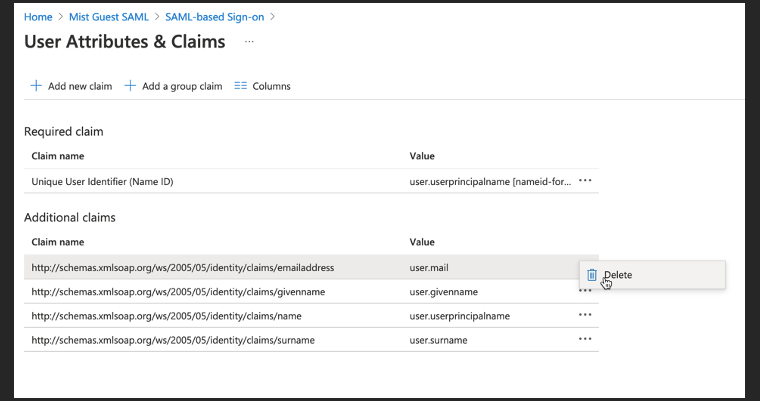
Delete “name” claim as shown below:
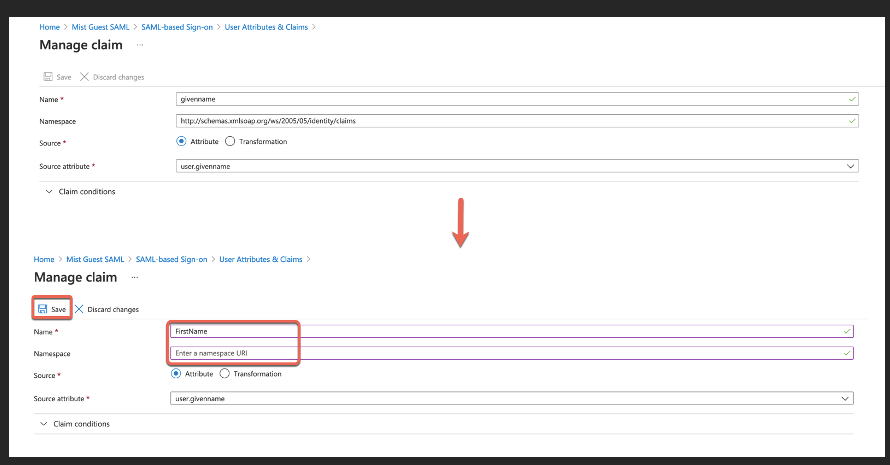
Edit “givenname” claim. Empty the Namespace field and change Name field to “FirstName”:
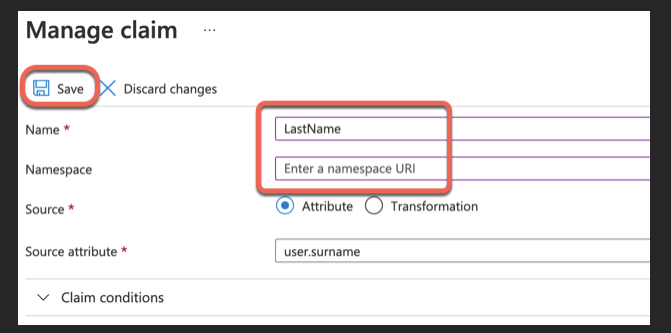
Edit surname claim. Empty the Namespace field and change Name field to LastName:
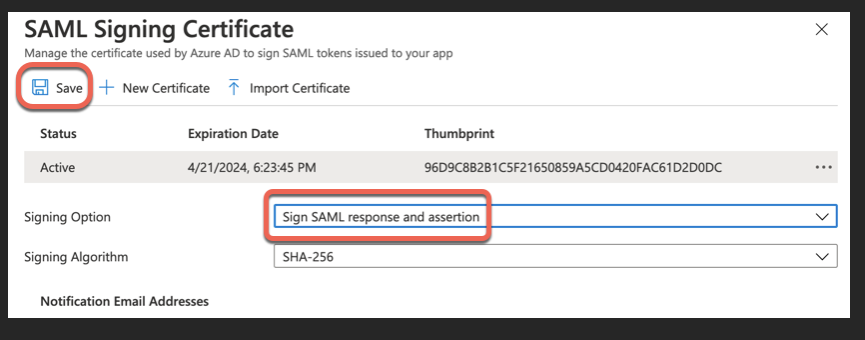
Go back to the main SAML configuration page and scroll to section 3 and click edit.
Select to sign both SAML Response and Assertion:
Now go back and click on Download Base 64 certificate:

Back to Mist Dashboard
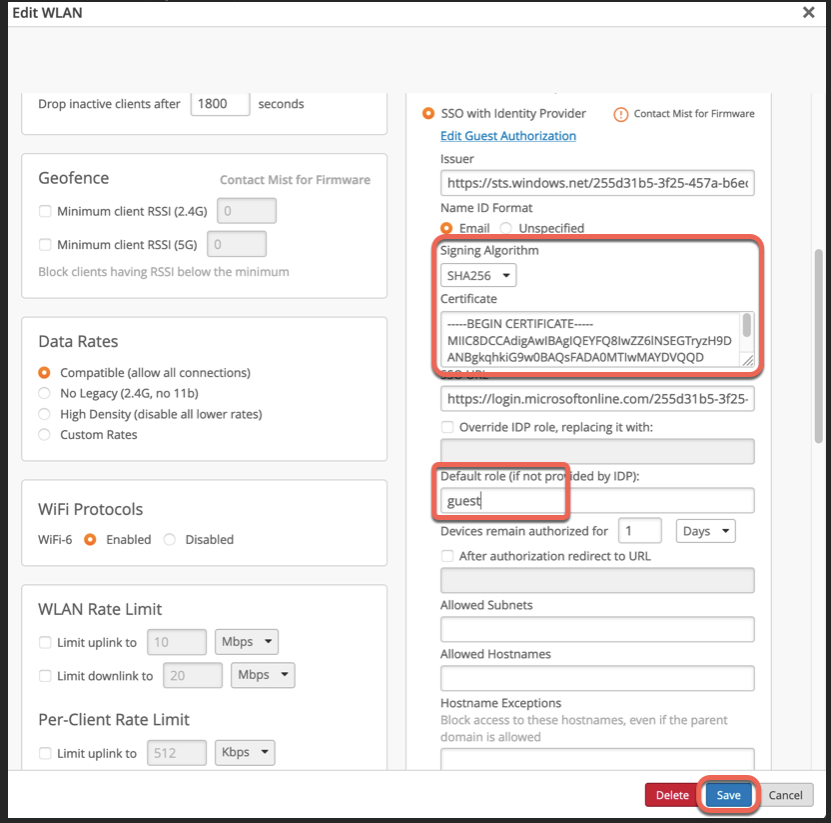
Open this certificate as a text file, copy its contents into Mist SSO config under WLAN, set Signing Algorithm as SHA256 and configure default role for guest authorization (optional):
As a final step, add the following FQDNs into the Allowed Hostnames field to allow the guest clients to access Microsoft for login via Azure:
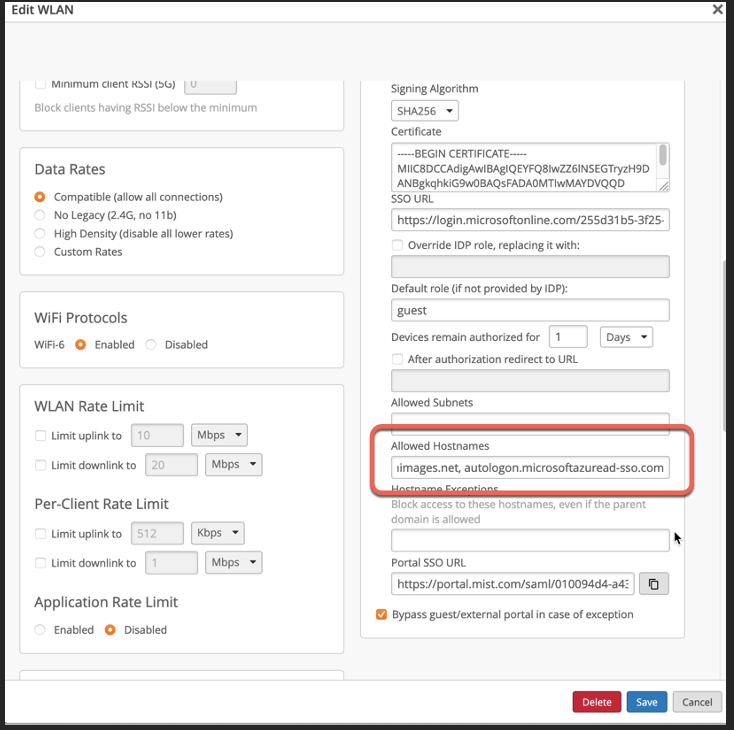
login.microsoftonline.com, mobileappcommunicator.auth.microsoft.com, aadcdn.msauth.net, aadcdn.msftauth.net, Microsoft account , aadcdn.msauthimages.net, autologon.microsoftazuread-sso.com,msftconnecttest.com


